
Welcome, coach! Let’s dive into creating a defense that’s both sturdy and smart. Just like athletes use a “one-drop” method in strength training for steady gains, a solid drop coverage scheme is your defensive foundation. It’s reliable and makes opponents work hard for shots.
In this guide, we’ll cover everything to build a top-notch defensive package. We’ll start by looking at why this system is key for today’s teams.
Just as a trusted training method boosts athletic power, a strong defensive plan enhances your team’s court presence. Get ready to see your team’s defensive skills and strategy improve!
Deep vs. at-the-level drop defined
Drop coverage isn’t just one thing—it’s a range of strategies. Knowing where to place your team is key to success. The main two types are deep drop and at-the-level (contain) coverage. They’re like choosing between a squat and a box jump; both build strength but for different reasons.
Let’s look at each type, starting with the classic.
A deep drop tells your big man to go back towards the paint, often below the screen. The goal is rim protection. By going deep, the defender blocks the basket, making the ball handler jump from far away. It’s a “bend but don’t break” strategy, giving up mid-range to protect the rim.
On the other side, at-the-level coverage is also known as contain coverage. Here, the big man steps up to meet the ball handler near the screen. This puts pressure on the dribbler and reduces open mid-range space. It’s a bold move that challenges the offense to make a precise pass.
So, what’s the trade-off? A deep drop blocks the paint but invites pull-up shots. An at-the-level contain coverage challenges jumpers but might be vulnerable to passes for a roll to the basket. Your choice depends on your team and what you’re willing to sacrifice.
Understanding drop coverage is the first step to a flexible defense. Now that we’ve defined these terms, we can explore the specific footwork and techniques for each style.
Big’s footwork: drop line, hips, hands, backpedal vs. slide, veer step
Your big’s footwork in the deep drop is key. It’s like the anchor of your defense. Their footwork sets the tone for everything that follows. Let’s break down each piece to build an elite drop package.
First, find the “drop line.” This is the spot on the floor your big must occupy. It’s not just any spot; it’s the depth that protects the rim and challenges the ball handler. Finding this line is critical.
Hip positioning is next. Should your big be squared to the ball handler or to their own man? It depends on the threat. Generally, we want hips squared to the ball to see both the driver and the pass. This opens up their vision and allows for quicker reactions.
Hands are also important. They should be up and out, disrupting passing lanes and contesting shots. Think of them as early warning systems and tools to shrink the space the offense thinks it has.
Now, choose between backpedal vs. slide. A controlled backpedal is great for maintaining vision and defensive depth as the ball handler comes downhill. It keeps you in front. The slide, a lateral shuffle, is better for staying connected to a rolling threat without opening up a driving lane.
For disrupting a roller without fully committing, teach the “veer step.” This is a slick, short step into the roller’s path with your inside foot. It’s a bump or a “veer” that slows them down, buys time for your guard to recover, and doesn’t leave you vulnerable to a dump-off pass. It’s a game-changer for handling skilled roll men.
Mastering this combination—drop line, smart hips, active hands, and intelligent footwork—transforms your big. They become the defensive quarterback of your drop coverage. It’s the technical bedrock that makes every other part of the system work.
Guard’s job: chase, angle, rear-view pressure, under vs. over rules
A perfect drop by your big man is useless if the on-ball defender gets screened out. Your guard is the heart of this defense. They need to chase with a mindset we call the chase.
Imagine you’re tied to the ball handler by an invisible rope. Your goal is to keep that rope from breaking. Even with a screen, you aim to stay connected. This constant pressure is key to the drop system’s success.
Mastering the fight over the screen is an art. You can’t just rush at your man. Instead, take a wide, aggressive path around the screener’s shoulder. This keeps your hips on the ball handler and prevents getting stuck.
Now, let’s talk about the touch-and-go. As you go over the top, make brief, firm contact with your big man’s hip or shoulder. It’s not a push! It’s a signal. It tells your big, “I’m here, screen passed, I’m chasing.” This keeps you on the right path for rear-view pressure.
Rear-view pressure is the contest from behind the ball handler. Because you chased over the screen, you’re now on their back hip. From here, you can contest a pull-up jumper without fouling. This guard-big communication is a dance. The touch-and-go keeps you in sync.
But, you can’t fight over every screen. You need rules. Going under the screen is a smart move, not a weakness. Your choice between under and over depends on the shooter.
| Scenario | Rule | Reasoning |
|---|---|---|
| Ball handler is a non-shooter or poor from deep | Go UNDER the screen | You give up space for a low-percentage shot. You stay between the ball and the rim, ready to help on the drive your big is funneling. |
| Ball handler is a good shooter or elite scorer | Fight OVER the screen (mandatory) | You cannot give them an open look. The chase and touch-and-go are essential to contest the shot while trusting your big in the drop. |
| Screen is set very high (near half-court) | Often go UNDER | There’s too much ground to cover fighting over. Recovering to the drive is the priority from this distance. |
| Late in the shot clock | Fight OVER aggressively | Force the ball handler to waste time. Make them put the ball on the floor into your waiting big. |
Learn this table. These rules make your chase smart and controlled defense. Talk with your big before the game: “We’re going under on #5, over on #23.” This talk builds a partnership that shuts down offenses.
Your guard’s effort—the chase, the angle, the touch-and-go—is what makes your defense elite. It’s the pressure that makes every dribble hard.
Help structure: nail/low-man tags, x-out, split-the-difference on weakside
The strength of a drop coverage isn’t just in the big man’s feet. It’s in the organized chaos of the weakside helpers. Think of your defense as a net. The ball screen is where the ball hits the net, but the other three defenders are the strands that tighten to catch it.
This help structure is what stops easy baskets. It turns good defense into a shutdown system.
When the ball is on one side of the floor, we instantly identify two key helpers: the nail helper and the low-man.
- The Nail Helper: This is usually the defender at the “nail”—the middle of the free-throw line. Their job is to be the first line of help against the rolling big man.
- The Low-Man: This is the defender on the weakside block, farthest from the ball. They are the last line of defense, protecting the rim from a lob or a dump-off pass.
Both have one critical task: to tag the roller. A tag isn’t a full switch or a hard foul. It’s a physical “bump” or show of presence that slows the rolling player down.
This weakside tag disrupts timing. It forces the ball handler to think twice about throwing a pass inside.
But what happens after you tag? You can’t stay with the roller forever. This is where the x-out rotation comes in. “X-out” means you recover back to your original assignment.
The nail helper bumps the roller, then “x’s out” to find his own man, often a shooter in the corner. It’s a quick, urgent scramble that keeps shooters covered.
Sometimes, a helper gets stuck between two threats. Imagine you’re the low-man, and you see both a shooter in the corner and the roller diving. Who do you guard? You split the difference.
Position yourself in a spot where you can contest a pass to either player. Your stance and vision should be active, ready to close out to the corner or jump up to tag the roller again. This is a fundamental weakside tag decision-making skill.
Organizing this activity is everything. A good rear-view contest by the guard chasing over the screen is useless if the roller gets a free run to the basket. The tag from the weakside makes that guard’s effort valuable.
It’s a five-player chain reaction: the guard fights over, the big drops, and the helpers tag. When done right, the offense sees a wall of defenders where they expected an open lane.
Mastering this help structure transforms your drop from a simple two-man tactic into a connected team defense. It turns possible layups into difficult, contested floaters or kick-out passes. Remember, the best defenses aren’t just about the players on the ball; they’re about the players away from it, ready to provide that critical rear-view contest support.
Versus actions: Spain PnR, step-up/angle, ram screens, empty corner, slips
Opponents will try to outsmart your drop with clever moves. Being ready for step-up screens and slips is key. Your defense needs to be flexible.
Let’s look at common advanced actions and how your drop can handle them.
This action starts with a two-screen play. The first screener sets a pick, then gets a back-screen. The goal is to free the first screener for a basket.
Your drop rules are the same. The big stays in his spot, protecting the paint. The guard goes over the first screen. The weakside defender must tag the big man rolling to the basket.
After the tag, he goes back to his man. This “x-out” stops the Spain action.
Step-Up and Angle Screens
These picks are set at unusual angles. A step-up screen forces a defender to the sideline. An angle screen is set diagonally.
Your guard must fight to get past the screener’s hip. Stay attached to the ballhandler. The big man must split the difference, showing his hands to deter the pass.
Ram Screens
A ram screen is a down-screen for a ballhandler, leading to a handoff. It gives the guard a lot of momentum.
Your guard must use aggressive “rear-view pressure.” Chase from behind, being physical and tight. Your big man must meet the guard at the screen, wall up, and force a kick-out.
Empty Corner Actions
This is a spacing nightmare. The weakside corner is empty, stretching your defense thin. There’s no traditional corner defender.
Your system adjusts. The low defender on the weakside becomes the primary helper. He must split the difference between his man and the paint. Your big man must be vocal, directing this help.
The Dreaded Slip
This is the screener’s counter. Instead of a solid pick, he slips to the basket early, surprising the defense.
Reading the slip is an art. Your big man must watch the screener’s shoulders and hips. If they turn toward the basket early, it’s a slip! The big must jump to the ball, cutting off the passing lane.
The guarding defender must shout “SLIP!” and fight to get between the ball and his man. This turns a layup into a turnover.
Mastering these adjustments makes your drop dynamic. You’re not just running a coverage; you’re solving problems in real time. This is how you build an elite, championship-level defense.
Teaching Progression and Drill Bank
Learning to defend like a drop defense is like learning a musical instrument. You start with simple chords before playing the full symphony. This section is your guide, from basic to complex rotations needed in games.
We believe in isolation before integration. We build confidence and muscle memory step by step.
The Foundational 2v2: Chaser & Big
Start with two players on offense (a ball handler and a screener) and your two main defenders. Focus on perfecting footwork and communication between the guard and big.
Drill Setup:
- Place a cone at the top of the key to simulate a screen.
- The offensive guard uses the screen, and the defensive guard practices his chase technique.
- The big focuses solely on his drop depth, hip turn, and hand positioning.
- No shot is taken initially. Just repetition of the movement.
Coaches should give live feedback on the big’s “wall” and the guard’s angle. Do this until the two-man action becomes second nature.

Adding the Third Layer: 3v3 with the Low Man
Now, we introduce the critical help defender: the low man. Add a third offensive player in the weakside corner and a third defender assigned to them. This transforms the drill from a partnership into a system.
The low man now has a job: read the drive and be ready to tag the roller or split the difference. This is where your help structure comes to life.
Drill Progression:
- Tagging Drill: On a pass to the roller, the low man sprints to “tag” (fake a foul) the rolling big to discourage the finish, then recovers to his own man.
- X-Out Drill: After the tag, the original big now “x’s out” to recover to the low man’s original assignment.
This 3v3 segment teaches the weakside defender his dual responsibility: stay connected to his shooter but be the helper when the ball penetrates.
Live Tags: The Final Test
Knowledge is tested under fire. In the “live tags” phase, the offense is free to try to score. The ball handler can shoot, pass to the roller, or skip to the weakside corner.
This forces your defenders to make real-time decisions. Does the big stay in his drop? Does the low man tag hard or stay home? The chaos of live action reveals understanding and builds game-speed competence.
Run these sequences repeatedly. The goal isn’t to stop every play initially, but to see the correct rotation every time. Speed and execution will follow.
By following this progression—2v2, 3v3 with a low man, then live action—you aren’t just teaching a scheme. You are building habits. Your players will see the game in layers and react with collective intelligence, turning your drop package from a concept into a weapon.
Scouting toggles: drop depth by ballhandler/rim threat, pop vs. roll shooters
Think of your drop coverage as adjustable dials, not a fixed scheme. A static defense gets scouted and exploited. An elite defense adapts during the game using pre-snap reads. This section is about giving you those coaching toggles.
Your first major dial is drop depth. How far back should your big man sit? The answer changes with every ball screen.
If the ball handler is a lethal pull-up shooter, a standard drop gives him too much space. Here’s where the ICE-to-Drop toggle comes in. You instruct your guard to “ICE” or “down” the screen, forcing the handler toward the sideline first. Your big man then executes his drop from that angled path. It’s a two-step process that takes away the shooter’s airspace immediately.
Conversely, if the ball handler is a drive-first player but the rolling big is a dunk threat, you toggle the other way. Your big’s drop depth becomes shallower. He meets the roller higher to cut off the runway, trusting your weakside help to rotate behind him.
The second critical toggle is for the screener himself. Is he a “pop” shooter or a “roll” man? Your big man needs a clear pre-snap read to make the right decision.
- Pop Shooters: Your big stays attached higher. He’s ready to close out to the three-point line if the screener flares out. The drop is almost nonexistent because the rim threat is low.
- Roll Men: Your big commits to the drop depth you’ve set for the rim threat. His hands are ready for the lob, and his feet are active to wall up in the paint.
These aren’t guesses. They are commands you install based on your scouting report. Let’s break down the toggle factors:
- Ball Handler Threat: Elite shooter = use ICE-to-Drop. Driver = standard or shallow drop.
- Roller Threat: Athletic finisher = shallow drop. Less threatening = deeper drop to protect the paint.
- Screener Type: Pop player = big stays high. Roll player = big drops.
By mixing these toggles, you create a customized game plan. You might ICE-to-Drop against their star guard but play a shallow drop when their backup point guard is in. Your defense becomes a puzzle the offense has to solve anew each possession.
The beauty of this system is its flexibility. You give your players a framework of rules, not rigid instructions. They learn to read the game through the lens of your scouting. This turns your drop coverage from a basic shell into a sophisticated, opponent-specific weapon.
Start your next film session with these toggles in mind. Label each ball handler and screener. You’ll quickly see where your dials need to be set for tip-off!
Metrics to track: ball screen PPP, rim frequency, midrange quality, paint to great threes
Want to know if your drop footwork and help rotations are paying off? Gut feelings and film sessions are key, but they need data. Tracking the right numbers helps you see what’s working and where you’re exposed.
Let’s look at the four key metrics for a clear picture of your drop defense’s health. Think of these as your defense’s vital signs.
This table summarizes what to track, why it matters, and what the numbers are telling you.
| Metric | What It Measures | Ideal Outcome | When to Worry/Adjust |
|---|---|---|---|
| Ball Screen PPP | Points Per Possession scored by the offense directly off ball screens you defend. | Below 0.90. This means you’re winning more possessions than you’re losing. | If PPP is above 1.00, the offense is scoring efficiently. Check rim and three-point data to find the leak. |
| Rim Frequency | The percentage of opponent shots that come at the rim against your drop. | Under 30%. Your big is protecting the paint and forcing tougher shots. | If frequency is high, your big’s drop depth may be wrong or help is late. A veer/peel switch might be needed vs. elite rim runners. |
| Midrange Quality | The effectiveness (FG%) of pull-up and floaters from the “drop zone.” | Forcing contested, low-percentage attempts (under 40% FG). | If shooters are hitting over 45% from midrange, your big isn’t contesting well, or your guard is getting buried on screens. |
| Paint to Great 3s Ratio | Are you trading rim attempts for open corner threes? | Low rim frequency AND low opponent corner-three rate. You’re not giving up easy shots anywhere. | High rim frequency OR a high rate of open corner threes means your weakside help is out of sync. |
The Paint to Great Threes ratio is key. A good drop should shrink the paint. But if it shrinks too much, your defenders will leave shooters open. You want to see a low number for both rim shots and open corner threes. If one is high, your help structure needs attention.
So, when does the data say to change tactics? If your rim frequency is too high and the ball screen PPP is climbing, your pure drop might be getting exploited. This is where the veer/peel switch becomes a data-driven option. The numbers show the driver is getting a runway to the basket. A veer action can disrupt that path without fully abandoning your drop principles.
Using these metrics turns coaching into a science. You’re not just saying, “Our drop was soft tonight.” You’re saying, “Their ball screen PPP was 1.15, mainly from rim attempts, so we need to adjust our big’s depth tomorrow.” That’s powerful. It validates your good decisions and objectively highlights areas for growth, making you and your team smarter every game.
Film room cues and clips checklist
Your team’s defense gets better fast when you actively look for specific cues in film study. This makes video review a powerful teaching tool. Let’s create a checklist so you know what to look for every time you watch.
Great film sessions are focused. You’re not just watching a game. You’re looking for evidence of your system working or breaking down. This targeted approach makes a perfect teaching tape with clear examples.
Follow this step-by-step process to structure your review. It ensures you cover all the critical pieces of your drop package.
- Start with the Big’s Drop Line. Is his positioning consistent from screen to screen? Pause the film when the ball handler comes off the pick. Draw a mental line from the big’s feet to the rim. Is he in the same spot every time? Clip one example of perfect depth and one where he’s too high or too low.
- Evaluate the Guard’s Chase Angle. Watch your guard fighting over the screen. Is he taking the most direct path to apply rear-view pressure? Or is he getting hung up and creating a wide driving lane? Look for that sharp, aggressive angle we drilled. Save a clip of a great “over” fight and one where the angle is too flat.
- Audit Weakside Helper Urgency. Your eyes should now snap to the weakside defenders. When the ball enters the paint, are they tagging with purpose? Are they “splitting the difference” ready to x-out? Capture a clip where helpers fly in to nail the roller and one where they are a step slow.
- Tag Clips for Immediate Feedback. Use your video software’s tagging feature. Create labels like “Drop Line – Good,” “Chase Angle – Fix,” and “Help Urgency – Excellent.” This organizes your evidence and makes it easy to build specific video playlists for players.
- Review the Clips as a Team. Show the good clips first to reinforce the standard. Then, show the “fix” clips without naming names. Ask questions: “What do we see here?” “What should happen?” Let the players identify the cues themselves.
This checklist turns film into a puzzle you’re solving together. You are hunting for proof of concept. When players see their own successes and mistakes through this focused lens, learning accelerates dramatically.
Make this a weekly habit. The film room is where championships are built in the offseason. By consistently applying this checklist, you give your team clear, visual feedback. They will see the game through the same defensive lens you do.
Common mistakes and quick fixes
This section is your quick guide to fixing common drop coverage flaws. Even the best teams can develop bad habits. We’ll cover the most common mistakes and simple fixes for your next practice.
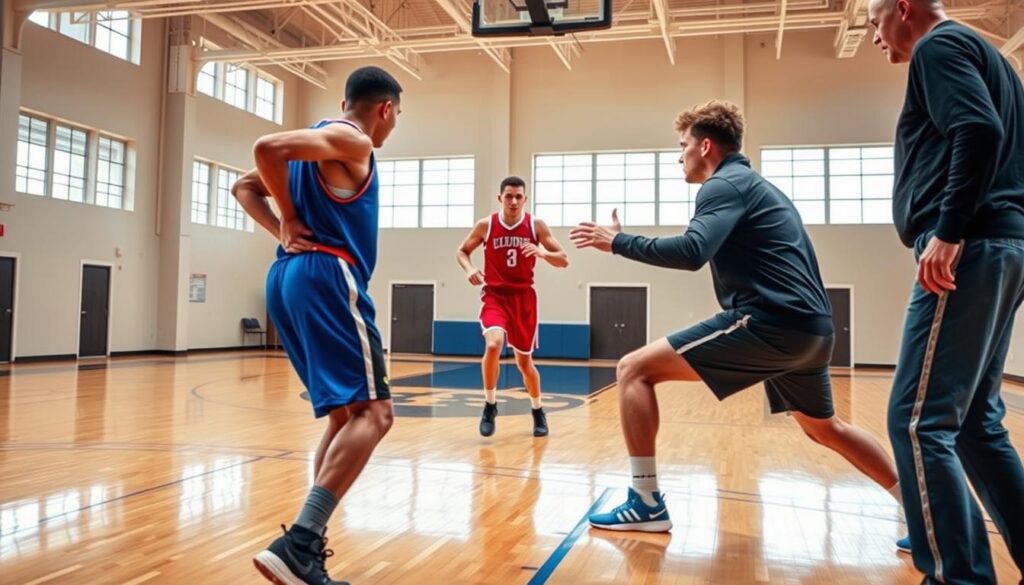
A big mistake in a deep drop setup is the big man retreating too far. They become spectators. This creates a wide-open area for the ball handler, leading to easy shots.
Quick Fix: Use the “Elbow Line” cue. Place cones at each elbow. Drill your big to drop only to these cones, not the baseline. This limits their depth and keeps them in a contesting position.
On the other side, a guard failing in their contain coverage duty is damaging. The most common error is going under a screen against a shooter. This is a direct rule violation, inviting the offense to take their best shot.
Quick Fix: Implement the “Ear to Shoulder” chase drill. The guard’s goal is to stay tight to the screener. This emphasizes the physicality and angle needed to stay attached and apply pressure.
Poor communication on the weak side is another issue. The low-man helper gets caught “split-the-difference” and doesn’t fully commit. This leaves the nail helper isolated, making it easy for the big to dunk.
Quick Fix: Run 3-on-3 shell drills with a live ball screen. Freeze the play after the pass to the roller. Ask your defenders: “Who was the low-man? Did they tag?” This technique builds instant recognition.
Sometimes, the mistake is strategic, not technical. Using a standard deep drop against a team that lives on floaters is a recipe for disaster. You’re playing into their hands. Your defense isn’t broken; the game plan is.
Quick Fix: This is a scouting toggle. Identify one opponent shooter who is a “pop” threat versus a “roll” threat. Decide before the game that against the pop threat, your big will drop. Against the roll threat, they will show harder. This proactive adjustment fixes the problem before it starts.
Guards often turn their back to the ball after navigating the screen. They lose vision and can’t see a skip pass or a slip. This breaks the entire help chain.
Quick Fix: The “Open Gate” cue. Tell your guards to imagine the screen is a gate they are opening with their chest, not their back. This mental image promotes staying square to the ballhandler, maintaining vision on both the ball and their man.
Remember, these mistakes are normal learning steps. The key is to spot them early and have a clear, actionable correction ready. By focusing on these contain coverage and deep drop fundamentals, you turn breakdowns into breakthroughs for your team defense.
Practice periodization and install schedule
Building your elite drop package needs a smart plan. You can’t install the whole system in one practice. It’s like a weightlifting program, starting with basic movements before adding more.
Your first week should focus on the basics. Run 2v2 drills where bigs and guards work on “touch-and-go” communication. This drill helps with basic footwork and positioning without extra help.
Week two adds the help structure. Now, add a weakside defender to your 3v3 drills. Players learn rotations like nail tag, x-out, and split-the-difference in a live setting.
Week three is for applying what you’ve learned. Introduce scouting toggles. Practice adjusting the drop depth based on the ballhandler. Work on defending Spain actions and ram screens.
This phased approach prevents mental overload. It ensures each layer of the defense is mastered before adding more. Your team builds confidence through repetition.
Start with this simple framework. Adapt the weekly focus to fit your team’s pace. Consistent, focused practice turns complex concepts into automatic habits.
