
Welcome, coach! Your pick-and-roll coverage choice is more than a tactical move. It’s the heart of your defensive strategy.
In today’s game, with skilled ball-handlers all over, your choice matters a lot. It decides if you’ll force tough shots or let in easy baskets.
Choosing a scheme like drop, switch, hedge, or blitz has a big impact. It affects your rim defense, three-point defense, and team energy. It’s like picking the right tool for the job.
As strategist Ben McCollum says, good defense often means controlling the pace and forcing half-court play. Your coverage choice is key in this process.
This guide will go beyond just listing options. We’ll dive into the “why” behind each coverage. This will help you build a defense that’s both adaptable and strong against any opponent, even in an empty corner setup.
Coverage taxonomy and glossary
Before we dive into strategies, let’s get the basics down. Pick-and-roll defense has its own set of terms. It’s like learning a new language. We need to make sure everyone understands these terms.
Knowing this vocabulary is essential, whether you’re playing, coaching, or just a fan. It’s like grasping a coverage glossary in football. Let’s explore the main coverages you’ll see on every court.
Here’s your essential cheat sheet for major PnR coverage types:
- Drop Coverage (Sink): The defender guarding the screener “drops” back toward the basket. The goal is to protect the rim and force the ball-handler into a mid-range shot. This is a foundational drop coverage strategy.
- Switch Everything: On any screen, the two defenders instantly trade assignments. It’s simple in concept but requires versatile personnel. A true switch everything scheme demands communication and players who can guard multiple positions.
- Hedge (Show & Recover): The screener’s defender steps out aggressively (“hedges”) to slow the ball-handler, then quickly recovers back to their original player. It’s a disruptive one-two punch.
- Blitz (Trap): Both defenders converge aggressively on the ball-handler to force a turnover or bad pass. It’s a high-risk, high-reward tactic, much like a defensive trap in other sports.
- ICE (Down): The on-ball defender forces the ball-handler toward the sideline and baseline, “icing” the screen away from the middle of the court. This funnels the action to a help defender.
- High Flat: The screener’s defender steps up to the level of the screen but stays flat, not allowing a direct drive. It’s a more aggressive alternative to a soft drop.
With these definitions clear, you’re already ahead of the game! Bookmark this page as your quick-reference guide. Each of these coverages has specific rules for footwork, positioning, and communication.
Now that we’re all speaking the same language, we can dive into the how. In the next section, we’ll explore the precise court alignment and techniques that make each system work.
Rules of each coverage: court alignment, footwork, hand usage, body angles
Now we dive into the details: court alignment, footwork, and body angles for each coverage. Knowing the name isn’t enough. We must teach the exact movements that turn a whiteboard idea into a play-stopping reality.
Let’s break it down coverage-by-coverage. We’ll focus on the foundational rules for three core styles.
The Hard Hedge
The goal of a hard hedge is to contain the ball-handler completely. Your big man isn’t just showing; he’s creating a temporary two-on-one situation.
Court Alignment & Footwork: The hedging defender must “jump out” aggressively toward the ball-handler. He needs a wide, stable base—feet wider than shoulder-width. This isn’t a casual step. It’s a explosive move to cut off the driver’s path.
Hand Usage & Body Angles: Arms should be active and high, disrupting the ball-handler’s vision and passing lanes. The key coaching point? Cannot let there be any space between you and the ball-handler. Your chest should be square to the driver, forming a wall.
The body angle is critical. You aren’t trying to steal the ball. You’re trying to stop progress and funnel the action back toward your recovering teammate.
At-the-Level Coverage
In at-the-level coverage, the on-ball defender’s job is to fight over the screen and stay “level” with the screener. This prevents a clean, downhill drive to the basket.
Footwork is everything here. You must use a quick, aggressive step to get over the top of the screen. Your hips should be low, and you need to “hug” the screener tightly to minimize the space you give up.
Body Angles: As you fight over, your shoulder should almost brush the screener. Once you’re past, you immediately get back into a defensive stance, squared up to the ball-handler. Your angle should force the driver toward the sideline or your helping teammate, not toward the middle of the floor.
Hands should be active, mirroring the ball, ready to contest a pull-up jumper.
Switching & ICE Principles
Switching seems simple, but the rules prevent mismatches from being exploited. Communication is the first rule—a loud “SWITCH!” is non-negotiable.
For the defender guarding the screener: You must “tag” or bump the ball-handler as you switch. This slows their momentum. Your footwork involves a hard, lateral step into the driver’s path.
ICE (or “Down” or “Blue”) coverage has very specific geometry. The on-ball defender forces the ball-handler to the sideline by positioning his lead foot on the side of the screen. He basically invites the driver to use the screen, then immediately cuts him off.
The big man’s rule is to drop deep into the paint, forming a barrier at the “nail” (the middle of the free-throw line). His body is angled to watch both the ball-handler and the rolling screener. His hands are up, protecting the rim.
A common rule for switches on the perimeter: if you’re at a size disadvantage, you might go under the screen on the switch to stay in front and avoid being posted up.
Mastering these mechanical rules—where to put your feet, where to point your hips, how to use your hands—is what separates a concept from a lockdown defense. Drill these specifics, and your team’s execution will soar.
Tradeoffs matrix: rim protection, 3PT allowance, rotation load, foul risk, rebounding
Think of your pick-and-roll coverage like a budget. You have limited defensive resources, and each choice spends them differently. There is no perfect, cost-free defense.
Your job is to pick the coverage that spends your resources in the way that hurts you the least against a specific opponent. This is your tradeoff matrix.
We’ll compare the major coverages across five critical spending categories: rim protection, three-point allowance, rotation load, foul risk, and rebounding. This creates your decision-making framework.
Let’s visualize this framework. The matrix below shows you exactly what you’re buying and what you’re giving up with each scheme.
| Trade-off Category | Drop | Switch | Show-and-Recover (Hedge) | Blitz | ICE/Top |
|---|---|---|---|---|---|
| Rim Protection | Excellent. Big stays near the basket to deter drives and rolls. | Variable. Depends on your big’s ability to guard guards on the perimeter. | Good. Initial show disrupts the ball, but recovery can leave the roller open. | Poor. Both defenders commit high, leaving the paint empty. | Very Good. Forces ball away from the middle, funneling drives to help. |
| 3PT Allowance | High for Pull-ups. Gives the ball-handler space for a jumper. | Low. No space for a clean look off the screen. | Very Low. Aggressive show smothers the ball-handler’s three. | Extremely Low. Double-team denies any shot from the handler. | High for Corner 3s. Helpside defender is pulled into the paint. |
| Rotation Load | Low. Minimal help required from weak-side defenders. | Very Low. No help needed; it’s a pure 1-on-1 play. | Very High. Weak-side defenders must tag the roller and recover to shooters. | Extreme. Triggers a full defensive scramble and rotation chain. | Moderate. Requires timely help from the nail defender. |
| Foul Risk (Big) | Low. Big avoids contact by retreating. | High. Mismatches lead to reach-in or blocking fouls. | High. Aggressive contact on the show can draw whistles. | Very High. Trapping in space is foul-prone. | Low. Big contains without aggressive, risky challenges. |
| Rebounding Position | Best. Big is already in the paint to box out. | Poor. Big is stuck on the perimeter, away from the glass. | Fair. Big must sprint back to the paint after the show. | Worst. Both bigs are involved high, leaving no one to box out. | Good. Big maintains inside positioning while containing. |
| Primary Vulnerability | Pull-up jumper, short roll pass. | Mismatch isolation in the post. | Short roll pass, skip passes to weak-side. | Roller to the rim, corner three. | Corner three-pointer, long mid-range (often a *deliberate* trade). |
See how it works? A deep Drop invests heavily in rim protection and rebounding, but it pays for it by allowing pull-up jumpers. A show-and-recover hedge spends its budget on denying threes, but it runs up a huge debt in rotation load.
That rotation load is the hidden cost. When your big shows hard, your weak-side defenders must work overtime to tag the roller and fly out to shooters. One slow rotation, and you give up a layup or an open three.
Meanwile, the savvy offensive counter to both drop and hedge is the same: the short roll. A smart passer can loft the ball to the rolling big in the space between the defenders. This forces your defense into a frantic, often losing, scramble.
Use this matrix before the game. Match your team’s strengths (e.g., great rotating wings) against your opponent’s favorite plays (e.g., a point guard who lives on pull-ups). Your best coverage is the one where the trade-offs best fit that matchup.
Personnel fits by position archetype
Think of your defensive system like a custom suit. It must fit each player’s unique abilities. You wouldn’t ask a center to play point guard. So, why force a defensive coverage that clashes with your players’ skills?
Great coaching, as championed by Ben McCollum, is about amplifying what players are already great at. “We try to teach them what they are great at,” McCollum advises. Pushing a player to be average at many things often backfires. It’s far more freeing—and effective—to let them master and dominate within their natural strengths.
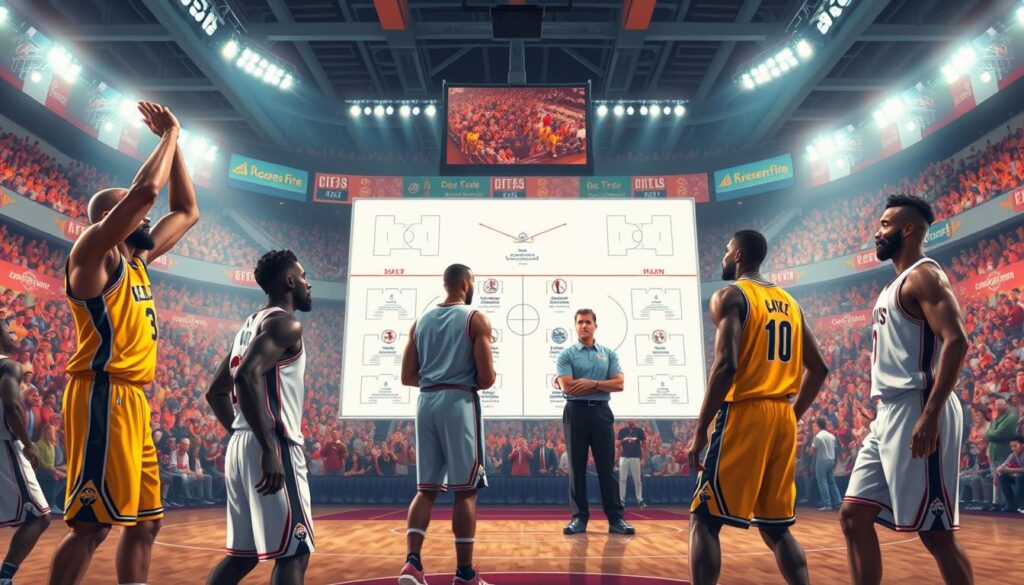
This philosophy directly informs how we match personnel to coverages. Let’s break down the ideal fits for common position archetypes.
The Mobile, Communicative Big
This player is agile, has great hands, and talks constantly on defense. He’s your prime candidate for aggressive trap/blitz schemes. His mobility allows him to hedge hard and recover. His communication ensures the backside rotation happens smoothly.
Forcing a slow-footed big into a blitz is a recipe for fouls and open lanes. But for your mobile big, it’s a chance to weaponize his energy and disrupt the offense’s timing.
The Savvy, Positionally Sound Wing
This player might not be the fastest, but he reads the game two steps ahead. He understands angles and rarely gets caught out of position. He excels in a late switch scenario.
In a late switch, he doesn’t pre-switch. He reads the screener’s intent and switches at the very last moment, preventing any advantage. This requires high basketball IQ and trust from his teammates.
The Bulldog Point-of-Attack Defender
This is your on-ball pest. He fights over every screen and pressures the ball handler relentantly. He is the engine for “Drop” coverage. His pressure forces the ball handler to reject the screen or take a contested pull-up.
Pair him with a rim-protecting big in drop, and you have a classic, tough-to-crack defensive combination. He doesn’t need to be a switch-everything athlete to be incredibly valuable.
The Traditional, Rim-Protecting Center
This big man anchors the paint. He’s less comfortable on the perimeter. For him, “Drop” or a conservative “Hedge” is ideal. It keeps him near the basket where he can contest shots and grab rebounds.
As one source notes, use a hedge coverage if you have versatile bigs. If you don’t, don’t force it! Let your traditional center own the painted area.
| Position Archetype | Key Attributes | Ideal Coverages | Coaching Tip |
|---|---|---|---|
| Mobile Big | Agile, communicative, active hands | Trap/Blitz, Hedge | Unleash his energy to create chaos. |
| Switching Wing | High IQ, positional, understands angles | Late Switch, Switch | Trust his reads; he’s your defensive quarterback on the wing. |
| Point-of-Attack Bulldog | Pressure, fights over screens, relentless | Drop (as the on-ball defender) | His pressure makes the drop coverage work. Praise his effort! |
| Traditional Center | Rim protection, rebounding, size | Drop, Conservative Hedge | Keep him in and around the paint. Don’t ask him to guard in space. |
The takeaway is powerful. Your job is to diagnose your roster’s strengths, not to impose a one-size-fits-all system. Does your personnel scream for an aggressive trap/blitz identity? Or do you have the savvy players to execute a nuanced late switch system?
Build your defense from the ground up, starting with your players. When you put them in positions to succeed, confidence soars, and performance follows. Let’s build around your athletes!
Scouting-driven game plans: opponent actions (Spain, Chicago, Zoom, ghost screens)
Your defensive game plan should fit your opponent’s style, not be a generic approach. A static defense can be easily broken. A scouting-driven defense, on the other hand, can anticipate and disrupt the opponent’s moves. This section will guide you on creating a smart plan.
Every offense has its go-to plays. Your task is to spot these from game footage and match them with the best defensive strategy. We’ll explore four common, yet dangerous, plays and how to stop them.
- Spain PnR: This isn’t just a pick-and-roll. It involves a third player setting a back-screen for the roller. This creates a complex screening action that can lead to a lob or a three-pointer. To counter a Spain PnR, your big man needs to communicate early. Your weak-side defender must aggressively tag the roller before recovering to the corner.
- Chicago Action: It’s a quick hand-off followed by a ball screen. This makes it tough to defend. Against “Chicago,” your on-ball defender must fight over the hand-off. Your big might need to “show” hard on the screen to slow the ball handler.
- Zoom Action (Pindown into Ball Screen): A shooter comes off a pindown screen and gets a ball screen right away. The goal is to create a lane for a hot shooter. The classic counter is to ICE the side ball screen. This forces the ball handler away from the screen and to the sideline, shutting down the middle.
- Ghost Screen: A screener pretends to set a pick and then quickly slips to the basket or pops out. It’s a finesse move to catch defenders off guard. The key is discipline. Your on-ball defender should not over-react to the fake screen. Your big must stay home, ready to guard the slip without over-helping.
Each action requires a specific response. Your scouting report should turn these opponent tendencies into clear defensive rules for the night. For example: “Against their favorite Zoom play, we are icing all side ball screens. Against their Spain PnR, we are tagging the roller with the weak-side corner defender every time.”
This approach simplifies your playbook into a workable strategy. You’re not teaching your team every coverage at once. Instead, you’re giving them the right tool for the job your opponent presents.
Great scouting is about simplifying the game. Identify the actions they run most, choose the coverage that best disrupts it, and practice that response until it’s automatic. That’s how you build a defense that thinks and adapts.
Teaching progressions for each coverage with constraints-led drills
How do you get a team to go from knowing a coverage to doing it well under pressure? It’s not one big, hard drill. It’s about smart progression that builds confidence step by step.
The “constraints-led” method is key. You start simple, limit choices, and then make it harder, like the game does. This turns rules into quick reactions.
Learning a song works the same way. You start with the basic melody, then add harmony, and lastly, the rhythm. This is true for teaching pick-and-roll coverage too.
Let’s look at ICE/Down as an example. The goal is to push the ball handler to the sideline, away from the screen. Here’s a 3-day drill plan that goes from idea to skill.
This plan is based on making things more complex. Each day, we add a new challenge or player. This way, we build decision-making skills in a controlled way.
- Day 1: The Foundation (2-on-2)
We focus on the basics. It’s just the ball handler, screener, on-ball defender, and the screener’s defender. The only goal is to force the dribbler to the sideline. We don’t allow passing, rolling, or popping. This isolates the defender, teaching essential footwork and angles. - Day 2: Adding the Helper (3-on-3)
Now, we add a weak-side defender. This player is the “low man” or helper in your shell defense. The defender must force sideline, but now the helper must be ready to “tag” the roller if passed. We’re teaching two defenders to work together. - Day 3: Full Read & React (3-on-3 with Options)
This gets game-like. We add the roller and popper as live options. The ball handler can now pass. The defense must communicate and execute the full ICE coverage: force sideline, tag the roller, and recover to the popping big. This adds the “rhythm section,” teaching defenders to read and react under pressure.
We never start with all five players. By drilling in pieces first, each player knows their role. This shared understanding makes 5-on-5 smoother.
The beauty of this method is it teaches decision-making, not just movement. Players learn *why* they move, not just where. This makes them smart defenders who can adjust quickly.
You can use this method for any coverage—Switch, Blitz, or Hedge. Start with the core action, add the first helper, then all the counters. This approach turns a complex system into a confident response for your team.
Communication system and call language
A silent defense is a broken defense. We’re giving your team a voice. Remember, the best scheme is useless without communication. As our source says: “Without proper communication, your defense will have breakdowns.” Let’s fix that.
We’re creating a defensive communication guide. It’s not about complex terms. It’s about a simple language everyone can use easily. When this works, your team acts as one, stopping opponents.
First, we need a basic vocabulary. Think of these calls as your defensive alphabet. Every player must know them, and they must be short, loud, and clear.
- “ICE!” or “BLUE!”: This tells the on-ball defender to force the ball handler toward the sideline and the big to stay home on the roller.
- “Switch!”: The universal command for two defenders to instantly exchange assignments.
- “Peel Switch!”: This is a more specific, advanced call. It’s when a helper defender—often from the weak side—yells this to switch onto the rolling big man, allowing the original defender to stay with their player.
- “Reject!”: The screen is being avoided; fight over the top.
- “Help!”: A general call signaling a driver has a beat.
“Switch” is broad. “Peel switch” is precise. It tells everyone exactly who is switching and onto whom. This precision eliminates hesitation, preventing open dunks.
To make this second nature, start with call-and-response drills. Practice your shell drill, requiring every movement to be called out. It might feel silly at first, but it will become natural.
Here’s a simple progression:
- Walkthrough Talk: Walk through a coverage at half-speed, requiring the correct call for each action.
- Live Talk: Run live actions with a constraint—if a call isn’t made, the play stops and you restart.
- Scrimmage with a “Talk Tax”: Any possession where the defense is silent results in an automatic point for the offense.
The goal is to make communication as automatic as dribbling. You want a chorus of voices on every screen. The point guard yells “Ice!” The weak-side wing sees the roll and shouts “Peel switch!” The big man hears it and knows he’s now guarding the shooter in the corner.
This synergy doesn’t happen by accident. It’s built through deliberate practice of a shared language. When your five players sound like one, they’ll start defending like one unstoppable unit.
Adjustments vs. re-screens, slips, pops, ghosting, empty corners
When the offense throws a curveball like a slip or a ghost screen, your coverage can fall apart quickly. But great defenses aren’t surprised. They have a counter for every counter.
This section is your troubleshooting guide. We’ll give your players clear “if-then” rules for the most common offensive tricks. Let’s turn confusion into confident reactions.
Slips: The Early Exit
A “slip” is when the screener fakes setting the pick and darts to the basket early. It targets aggressive hedging or switching. Your big man is expecting contact that never comes!
The universal adjustment here is the scram switch. It’s a late, emergency switch called to recover. The guard yells “Scram!” and chases the slipping big, while the original defender on the big recovers to the ball handler.
Timing is everything. The scram switch must be loud and immediate. Practice this drill: have your screener slip randomly. Your defenders must communicate the switch and recover without hesitation.
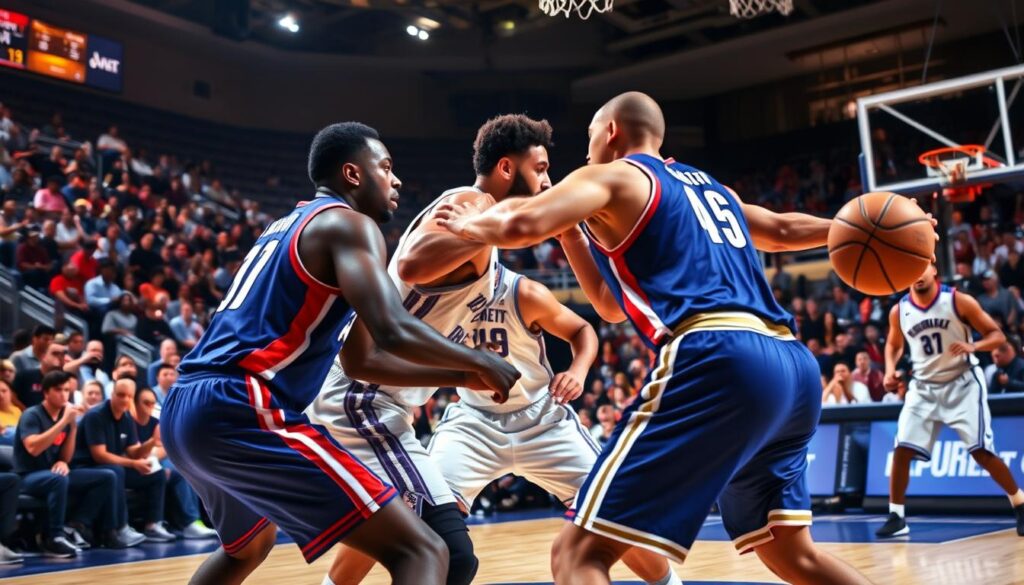
After setting a screen, a “pop” means the screener flares out to the three-point line instead of rolling. This punishes defenses that sink too deep into the paint.
The rule is simple: “If he pops, you stay; if he rolls, you recover.” The defender guarding the screener must stick with them on the pop. Do not help down into the paint. Your job is to take away the three.
This requires discipline. The guard defending the ball handler must fight over the screen and contest without expecting help from their teammate.
Re-Screens: The Grind
A re-screen is just a second pick-and-roll action immediately after the first. The offense is testing your stamina and focus.
The adjustment is mental and physical. The on-ball defender must fight over the screen again. The big must hold their coverage—don’t change the plan mid-stream. Communication like “Again!” or “Re-screen!” alerts the team.
Ghost Screens: The Fake Out
A ghost screen is when a player acts like they’re coming to set a screen but veers away at the last second. It’s designed to create indecision.
Treat it like a slip or a handoff. The defender on the “ghost” screener should stay attached to their man. The on-ball defender should not jump out expecting a pick. Yell “Ghost!” to alert your teammate there’s no screen to fight over.
Empty Corners: The Spacing Trap
An “empty corner” means the wing on the side of the pick-and-roll is vacated, pulling that defender away. This creates a wide-open lane for the roller.
Your low defender (often from the weak side) must be the “tag” man. They take one hard step into the lane to bump or slow the roller, then recover to their own player. The guard on the ball must pressure to make the pass difficult.
| Offensive Counter | Defensive Adjustment | Key Player Rule |
|---|---|---|
| Slip | Scram Switch | Guard chases slip, big recovers to ball. Communicate “Scram!” instantly. |
| Pop | Stay Attached | “If he pops, you stay.” Do not help off the three-point shooter. |
| Re-Screen | Fight & Hold | On-ball defender fights over again. Big maintains original coverage. |
| Ghost Screen | Ignore & Stay | No screen set. Stay with your original assignment. Call out “Ghost!” |
| Empty Corner | Tag the Roller | Weak-side defender tags the lane, then recovers. On-ball defender pressures. |
Mastering these adjustments turns your defense from reactive to proactive. Drill these “if-then” scenarios until they become instinct. A well-executed scram switch or a perfectly timed tag against an empty corner are signs of a smart, connected team.
Remember, the offense gets paid to score, too. Your job is to make them work for every single point. Now you have the tools to answer back.
Film Checklist and KPIs (Rim Attempts, Nail Tags, Corner 3s, Roll Efficiency)
Turning game film into a coaching tool starts with knowing what to track. Watching tape without a plan is like searching for a needle in a haystack. You need a focused checklist and KPIs to measure success.
This turns vague feelings into hard data. Instead of saying, “Our pick and roll defense coverages were soft,” you can pinpoint: “We allowed 12 rim attempts in the second half because our nail help was late.” This shows a clear path to improvement.
Before you hit play, run through this list. It turns passive watching into an active investigation.
- Identify the Coverage Call: On each PnR, pause and name the coverage your team intended to run (Drop, Switch, etc.). Was everyone on the same page?
- Track the Ball Handler’s Path: Did he turn the corner? Did he get into the paint? Your coverage dictates the acceptable path.
- Watch the Helper’s Eyes: Focus on your “nail” defender (the player in the high post/elbow area). Did they see the roll? Did they take a step in to “tag” the roller?
- Scan the Weakside Corners: When help rotates, someone is left open. How quickly did your weakside defenders close out to the shooters?
- Note the Final Result: What shot did the offense get? A contested mid-range jumper is a win. An open layup or corner 3s are losses.
The Four Essential Defensive KPIs
Now, let’s attach numbers to what you see. Track these four metrics over a game or a week of practice.
| Metric | What It Measures | Why It Matters | Good Benchmark |
|---|---|---|---|
| Rim Attempts Allowed | Number of shots (layups, dunks) within 4 feet of the basket generated directly from PnR. | The ultimate test of your interior defense. High numbers mean your coverages are breaking down or your help is absent. | Less than 8 per game |
| Nail Tag Frequency & Timing | Did your help defender at the “nail” (free throw line) actively step into the path of the rolling big man? | This is your first line of help. A timely tag forces a pass out or a reset, stopping easy scores. | Tag occurs on 90%+ of rolls; defender recovers to their man after. |
| Corner 3s Conceded | Open three-point shots from the corners created by your defensive rotations. | Shows the cost of helping. If this number is high, your rotations are too slow or your scheme is over-helping. | Less than 5 wide-open corner attempts per game |
| Opponent Roll Efficiency | Points per possession (PPP) when the screener rolls to the basket after the pick. | Tells you how effective the roll man is against your coverage. A low number means your bigs and helpers are in sync. | Below 1.0 PPP |
By focusing on these specific rim attempts and corner 3s metrics, you move the conversation. You’re not just asking players to “try harder.” You’re giving them a film clip and saying, “See here? Our nail tag was a half-step slow. Tomorrow, we drill that timing.”
This data-driven approach turns film study from a punishment into a puzzle you solve together. It provides clear evidence for why you might adjust a coverage or emphasize a specific drill. When you know your numbers, you know your next move.
Practice Plan Template (3-Day Install)
Ready to move from the whiteboard to the court? This 3-day install makes implementing your defensive system simple and effective. We’ve designed this template to build your team’s understanding and execution of pick and roll defense coverages in a logical, confidence-building sequence.
Remember, the second source stressed a vital point: always drill your coverages thoroughly before using them in a game. This plan ensures you do just that. The third source also highlights practicing at the desired game pace. Each day escalates intensity to match that standard.
Your first day is all about building a rock-solid foundation. Choose one primary coverage, like Drop, to install. Start with constraint-led drills that isolate the specific footwork, angles, and communication for that coverage.
Progress from 1-on-1 shell drills to 2-on-2 actions. Then, introduce 3-on-3 half-court play. This small-sided game lets players apply the new coverage in a live but controlled environment. The goal isn’t complexity—it’s creating correct habits.
End the day with a short film session. Review clips from the 3-on-3 play, pointing out successful executions and one or two key corrections.
Day 2: Integration & Complexity
Now, layer in a secondary coverage, such as Switch. Begin by drilling this new coverage separately with its own progressions. The magic happens when you start to mix them.
Use controlled 5-on-5 scenarios. You, the coach, can call out which coverage to use on each possession—”Drop this time!” or “Switch!”. This teaches players to toggle between schemes based on your command.
You can also introduce simple opponent actions, like a basic drag screen. The focus remains on executing the coverage correctly, not on winning the scrimmage. Another brief film review caps the day, comparing execution between the two coverages.
Day 3: Application & Game Simulation
This is test day. Shift to full-court, high-intensity 5-on-5 play that simulates real game conditions. Here, you introduce specific scouting triggers.
For example, you might tell your team, “When the ball handler uses a Spain screen, we go to our Hedge coverage.” Or, “If the roll man slips, we switch.” This connects your pick and roll defense coverages directly to your game plan.
Let them play through mistakes, then use timeouts for quick corrections. The final film session is the most important. Analyze the game simulation clips against your Key Performance Indicators (KPIs) from Section 10.
This entire 3-day install template is your flexible blueprint. Plug in your chosen coverages—Blitz, Ice, etc.—and follow the progression. Your team’s defensive IQ will grow visibly each week.
| Day | Primary Focus | Key Activities | Practice Segment Duration |
|---|---|---|---|
| 1 | Introduce Primary Coverage | Constraint drills, 2-on-2, 3-on-3 half-court | 40-50 minutes |
| 2 | Integrate Secondary Coverage | Drill new coverage, mixed coverage 5-on-5, controlled scenarios | 50-60 minutes |
| 3 | Game Simulation & Triggers | Full-court 5-on-5, scouting trigger application, live corrections | 60+ minutes |
Notice how each day includes a dedicated film review block (10-15 minutes). This consistent feedback loop is non-negotiable for rapid learning. Feel free to adjust durations based on your team’s level, but keep the sequence: Drill, Integrate, Apply. This template turns complex strategy into an actionable, winning routine.
Common breakdowns and troubleshooting
Your defensive coverages are like a car. Even the best need regular checks and fixes. This section is your guide for pick and roll defense coverages. We’ll help you solve common problems.
Great coaching isn’t about avoiding mistakes. It’s about fixing them quickly. Let’s get your defense running smoothly again.
Drop Coverage Breakdowns
Is the ball-handler making floaters in the soft space? Your guard might be going under the screen too soon. The fix is to say “chest to back.” Your on-ball defender should stay close to the ball-handler’s hip until they’re even with the screen.
Another issue is the roll man getting the ball too far away. This means your big is dropping too deep. To fix this, do a “controlled drop” drill. Have your big start in a show position, then step back with choppy steps, keeping hands ready for the ball and the roll man.
Hedge/Blitz Coverage Breakdowns
Getting split is a nightmare for any hard hedge. It usually happens because of the big’s footwork. They need a wide, low base with active hands.
If the pass to the roller is too easy, your guard didn’t “fight over” the screen enough. Use the “shoulder through” cue. The guard should get their lead shoulder ahead of the screener’s body to block the pass.
Switch Coverage Breakdowns
Missed switches ruin this coverage. It’s often because of poor communication. The call must be loud and early—”Switch! Switch!”—not as the play unfolds. Drill this with a “call and react” rule: no screen contact until the switch call is made.
A “lazy switch” creates a mismatch. The big doesn’t step up, and the guard doesn’t get skinny to recover. To fix this, treat every switch like a closeout. The big must meet the ball-handler with high hands, and the guard must sprint to tag the roller before finding their new assignment.
Universal Troubleshooting Tips
Many breakdowns come from poor positioning before the screen is set. Are your defenders in a “help and recover” stance, or are they flat-footed? A simple “stance and vision” check at the start of every practice can prevent many issues.
When a specific troubleshooting need arises, use constraints-led drills. If floaters are a problem, use a no-drop zone in the mid-range. If pocket passes are killing you, have a coach stand with a pad to simulate the screener. Isolate the problem, then expand the drill.
Remember, a breakdown is just data. It tells you exactly what to work on next. Keep this repair manual handy, use your corrective cues, and watch your team’s defensive IQ—and execution—soar.
Special situations: EOG, foul trouble, zone-to-man toggles
When the clock is ticking down and your top defender is close to fouling out, you might need to adjust your pick and roll defense coverages. These high-pressure moments can make or break a team. Let’s create a plan for the unexpected.
Your EOG (End of Game) strategy depends on one thing: what does the opponent need? If they need a three, keep them off the line. Stick to your base coverage to avoid risky switches.
If they need a two, focus on protecting the rim. Use “switch everything” to block driving lanes and force tough jumpers. Decide this before the play and communicate it clearly.
Foul trouble requires a different approach. If your rim protector has four fouls, they can’t play aggressive drop coverage. Change their role.
Have your guards fight harder over screens or execute more aggressive hedges. This keeps the action away from the basket. You might even use a zone defense to hide a player in foul trouble and protect the paint.
That zone toggle is a smart tactic. Show a 2-3 zone for one possession after a timeout. It disrupts the offense’s rhythm. Then, switch back to man-to-man coverage. Surprise is your best ally.
Being prepared for these special situations makes you a proactive coach. Don’t wait for the crisis. Have your EOG calls ready. Know your foul trouble adjustments. Practice your zone-to-man toggle. A complete defensive system works all game, not just in the first quarter.
Summary and implementation worksheet
You now have the complete playbook for pick and roll defense coverages. The journey from drop to blitz gives your team a full toolbox. Remember the core principles. Know your coverages inside and out.
Match them to your personnel’s strengths. Scout your opponent’s favorite actions. Teach through clear, progressive drills.
Knowledge becomes power when you put it into action. Your next step is this pick and roll defense implementation worksheet. Think of it as your one-page game plan. Use it to write down your team’s primary and secondary coverages.
Identify which players fit each defensive role. Note the top three opponent actions you must scout for each game.
Outline your three-day practice plan to install these concepts. Print the worksheet and fill it in. This simple act turns theory into your team’s identity on the court.
We are here to guide you as you build a dominant defense, one coverage at a time. Start your implementation today!
